If you’ve ever found a loose needle in your pincushion (or worse, your carpet), or forgotten whether that rotary blade is fresh or dull, you're not alone. Organizing your sewing needles and rotary blades isn't just about tidiness; it’s about safety, efficiency, and extending the life of your tools.
Whether you’re a quilter, an apparel sewist, or a “dabble in both” crafter, here’s how to keep your tiny-yet-mighty tools in order.
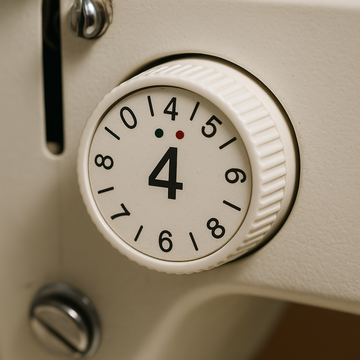
🪡 Sewing Machine Needle Storage Tips
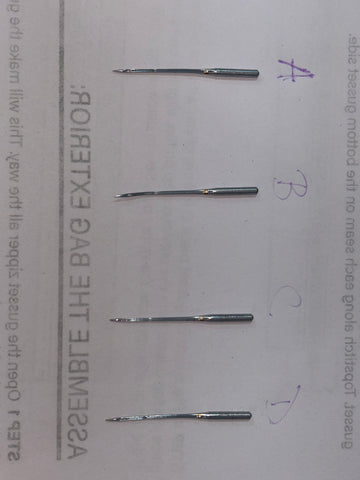
Machine needles come in all shapes and sizes: universal, stretch, denim, quilting, embroidery. Keeping track of what’s what can be a challenge.
1. Use a Needle Storage Case or Organizer
Invest in a needle case with labeled compartments for each type and size (e.g. 80/12 universal, 90/14 topstitch). Some options even include magnetic backing or snap-shut lids.
Best for:
-
Sewists who like visual order
-
Preventing bent or rusty needles
-
Quick swaps during projects
2. Repurpose a Weekly Pill Organizer
Yes, the kind your grandma uses. Each slot can hold a different needle type or “in use” needle. Label with stickers or a permanent marker.
Pro tip: Keep one labeled “used but still good” for needles you’ve tested but aren’t ready to toss.
3. Create a Needle Tracker
Make a simple tracker sheet (or use a free printable) to log the type of needle, date first used, and which project it was for. Great for knowing when to replace it—and for not forgetting what’s in your machine right now.
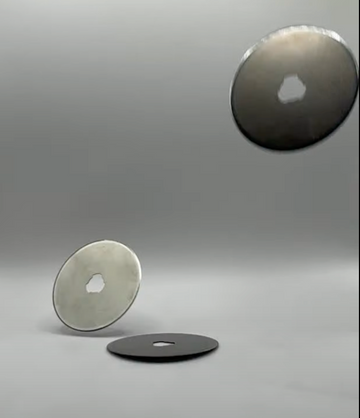
✂️ Rotary Blade Storage Tips
Rotary cutter blades are deceptively dangerous. Dull ones can ruin your fabric, and loose ones are just an accident waiting to happen.
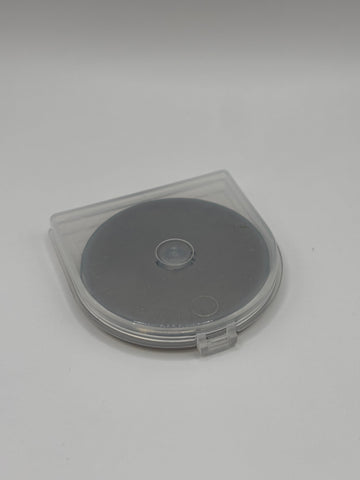
1. Use the Case They Came In (But Label It!)
If you buy your rotary blades in a round plastic clamshell, don’t toss it. Use it to store your used blades safely. Mark it with “DULL” using a permanent marker so you don’t mix them up.
Use these dull blades for:
-
Paper crafts
-
Cutting fusible interfacing
-
Vinyl or felt
2. Get a Blade Organizer or Blade Bank
Some brands sell blade storage cases with individual slots or magnetic holders. You can also use a magnetic spice tin, hardware nut/bolt box, or mini mint tin (with padding!).
Bonus: Drop used blades into an empty Altoids tin until it’s full, then label and recycle the entire thing responsibly with us!
3. Track Your Blade Life
Keep a sticky note or tracker near your cutting station with:
-
Date last changed
-
Type of fabric cut most often (cotton, denim, batting)
-
Blade size (e.g. 45mm, 60mm)
Blades dull faster with tough fabrics or lots of layers. Logging use helps avoid overuse (and underwhelming cuts).
🧼 General Tips for Storage and Safety
-
Store sharp tools away from little hands and curious pets.
-
Use clear containers so you can quickly see what you have.
-
Label everything! Even a piece of masking tape can save you time.
-
Group tools by category (e.g., cutting, stitching, marking) so you don’t scatter your focus mid-project.
🧵 Our Favorite Storage Helpers
Need a few ideas to get you started? Try these:
-
Magnetic tool bowls (for needles and pins)
-
Bobbin boxes with needle slots
-
Label maker or washi tape
-
Blade storage tins (or a branded blade case!)
-
Printable needle/blade tracker sheets
Final Thought: A Little Prep Saves a Lot of Stress
Nothing slows down your momentum like grabbing a dull blade or guessing which needle is in your machine. A few minutes of organization now can keep your tools sharp (literally) and your creativity flowing.
🛒 Need fresh blades? Grab a Precision Rotary Blades and Needles Bundle and keep extras on hand so you’re never stuck.
Happy sewing!
-Ellie